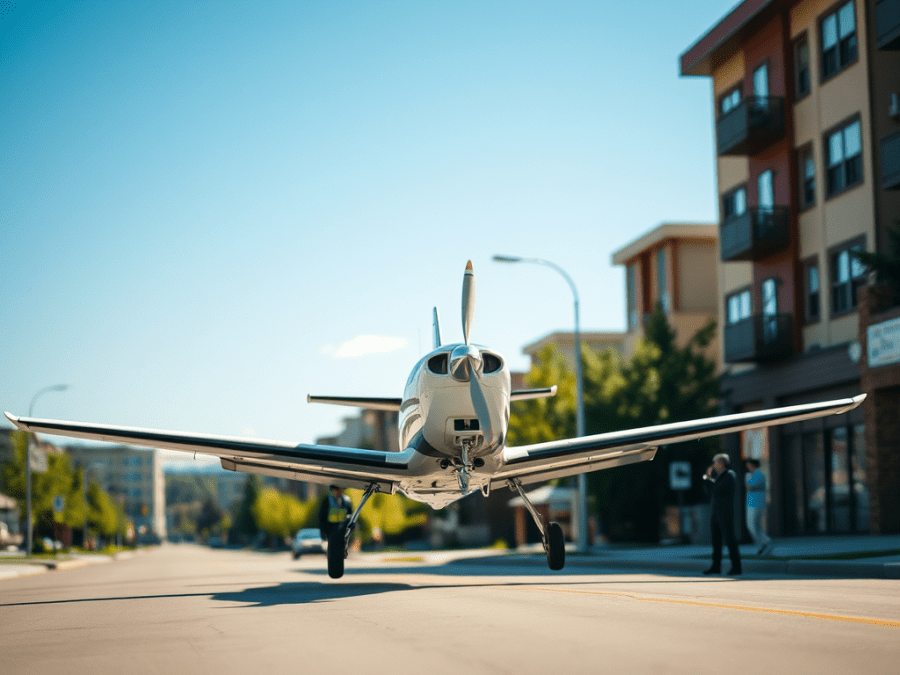
The recent landing of a Piper Navajo on a northeast Calgary street was a reminder that we need to be prepared to safely land an aircraft in the event of a power loss. However, for many pilots, it has been a long time since they practiced this. Since power loss will generally take you by surprise, it is important to practice this periodically so that your mind does not go blank when the engine suddenly gets quiet. Memorization and periodic repetition of the initial actions list will help you to be able to remember it quickly when you really need it.
Forced landing procedures are composed of three portions:
- Initial Actions
- Cause Checks
- Approach and Landing
If you are high enough, you will be able to complete all of these portions. However, if your engine failure is immediately after liftoff, you may only have time for the initial actions and the landing. The important thing is to maintain control of the aircraft until it is on the ground, whatever that surface may look like.
So let’s look at what is involved in each of these portions.
Initial Actions on Engine Failure
The first thing to do is to pull on the carb heat or alternate air. We do this first because it takes only a fraction of a second, and if we wait very long, the engine exhaust will no longer contain enough heat to melt any carb ice that may be there. Similarly, in a fuel injected system, an obstruction such as snow on the air filter can cause power loss, so selecting alternate air can result in quick restoration of power.
The second thing to do is to put the aircraft at its best glide speed, the speed that will give you the most gliding range. This speed should be committed to memory. If you are at cruise, you will need to hold the nose up and apply nose up trim as the aircraft is slowing to this speed. However, if you are climbing out when your engine quits, you will immediately need to push the nose down to normal gliding attitude.
Otherwise, the aircraft will slow quickly below the best glide speed, and you will risk stalling. At low altitude this may not be recoverable. Note also that if you still have some takeoff flap extended, the aircraft’s best glide speed will likely be lower than the flaps up best glide speed. Check your POH.
Next, look for a place to land and head there. In selecting a landing spot, use the acronym OWLS:
- Obstacles – you don’t want any if you can avoid it, either on the ground or on the approach
- Wind – where is the wind coming from? Use indications on the ground if you can; otherwise, use what you know about the current weather systems, or the wind direction when you took off to select a direction into the wind
- Length – at least long enough to land on, plus some more if available to give you margin for error.
- Surface – Hard and smooth, if you have the choice, otherwise, the best you can find. As you are flying, it is always good to locate the local airstrips if there are any. What better forced landing place could you ask for?
Obviously, the selected field has to be within gliding distance. It is also very helpful if there is civilization nearby, both for getting assistance, but also for medical attention if required. Roads can always be a consideration, but the risks are, of course, traffic, wires and signs. Still, if there is not much traffic, and few homes along the road, necessitating wire crossings, then roads may be a good alternative.
After selecting your site, figure out how you should do the approach. Obviously you should land into wind if possible. Assuming you are high enough, pick a spot to head for that would be about where you should turn from downwind to base in a normal circuit. This is called the key point. From your chart, estimate what the ground elevation is, and try to arrive at the key point at about 1000’ above ground. This puts you in the position to widen out your base leg if too high, or tighten it up if too low.
All of the above should be able to be done in a minute or so. We do this before doing cause checks because in areas where landing field are few and far between, it is important to get headed for an acceptable landing area before altitude loss takes options away.
While heading for the chosen landing site, you should now consider making a Mayday call, especially if you are a long way from a station that could hear you. It would hinder search efforts if you waited too long trying to troubleshoot, and then were too low to be heard. When making a Mayday call, also change the transponder code to 7700.
Cause Checks
If there is time while gliding, do your cause checks to see if you can get the engine working again:
- Check fuel gauges and change tanks to one that has fuel in it. Turn on the electric fuel pump if you have one.
- Mixture to full rich.
- Check the mags are on, try each separately. If no improvement, back to both.
- Check the primer is off and locked.
- Try different throttle settings.
- If the prop is stopped, you will have to use the starter.
- Try anything else suggested by your POH.
Approach and Landing
If none of this gets you restarted, you are going to have to land. Make your Mayday call if you haven’t done so already, then concentrate on making the landing.
Secure all of the energy sources that could start or feed a fire if the aircraft is damaged on landing:
- Shut off fuel, mags, mixture to idle cutoff.
- If you have electric flaps, leave the master switch on until you have the field made, and have extended all the flaps you need, then switch it off.
- Stow loose objects, brief passengers on what you are going to do, have them move seats back if in front, tighten seatbelts, use coats or other soft objects as cushions, talk about how to exit the aircraft and what to do after touchdown
- At the key point, plan base and final. If high at key point, widen out base, add some flap, slip if required to lose some altitude. Don’t overdo it. If low at key point, turn toward the landing area and shorten the final approach leg. Leave room to turn final.
- Maintain best glide airspeed. Try to be a couple of hundred feet high on final. Don’t get rid of altitude too quickly. When sure of making the field, can lose altitude with flaps or by slipping. If low, maintain best glide speed. Don’t try to stretch the glide by raising the nose. Better to touchdown short under control than to stall in. If there is a headwind, a small speed increase will help glide distance. Avoid the subconscious urge to dive if too high or stretch glide if low. Check airspeed frequently to ensure you are at best glide, and trim to maintain that speed until roundout and flare. Once flaps are down as much as will be used, turn the master switch off.
- If so advised by the manufacturer, unlatch doors before touchdown Land under control, avoid obstructions as best as you can, and brake as needed to get the airplane stopped. Exit and secure the airplane.
Need to Practice
Before having to do this for real, it is a good idea to practice this periodically. Look through the Emergency Procedures section of your POH or Aircraft Flight Manual for recommended procedure, which may add to or modify the above.
When practicing, make sure you warm the engine by applying cruise power for a few seconds every 1000’ of descent while gliding. Also be aware of the altitude regulations, and avoid annoying people, who may not understand what you are doing. Also be sure that you know the proper overshoot procedure.
Some aircraft will require a lot of nose down force to keep the nose from rising too much after full power is applied. Be ready to retrim as quickly as you can.
360° Overhead Approach
There is another procedure that can be used if high enough. This is called the 360° overhead procedure. You need to know beforehand what your aircraft’s descent rate will be, power off, at best glide speed. Say you know this figure is 600 fpm. Knowing this, you try to arrive overhead the beginning of the selected landing area at a height above ground level of twice the descent rate, plus 200’, headed in the direction of landing, which, of course, should be into wind. In this case, that would be 1400’ above the ground. Start a rate one turn, in either direction. Carefully hold the bank and airspeed. As the end of the 360° turn approaches, you should be doing a gentle turn to a close-in final and can do a slipping turn or add flap to lose any extra altitude.
If the wind has blown you back a bit, you may not have to lose much. If you arrive overhead the field at more than 1400’ AGL, you can fly straight in the direction of landing until half the excess altitude is lost, then start the rate one turn. Do another short straight section to lose the other half after one minute (180°), and you should then be right where you should be. If a little too low when arriving overhead, you can tighten the turn a bit to around faster.
Partial Power Loss
One other consideration is what happens if you have only a partial power loss. This case is often not covered in flight training, but in fact is the only case I have experienced. The most important thing to remember is to fly the airplane. You will need to pay immediate attention to airspeed. If you were climbing, you will quickly lose airspeed, so get the nose down. I would suggest going to best rate of climb speed. This is usually a little above best glide speed. If you can maintain altitude or still climb at this speed, great. It gives you more options. However, don’t overfly a safe landing airport just to get closer to home. The problem may get worse, so getting the aircraft on the ground safely is a priority. Turn towards the nearest safe landing area and head there. If in the circuit at a controlled airport, declare an emergency and tell the controller what you are going to do.
While preparing for landing, check carb heat, mixture, ignition, switch tanks. If all OK, concentrate on making the landing; find the problem on the ground. In my case, it was a piece of intake manifold gasket that had been improperly installed many years previously. A piece finally came out, leaving a small gap that cause one cylinder to go too lean and quit firing. My landing was made safely, but it was still a learning experience.
Avoidance
Of course, the best way to handle a forced landing is not to have one in the first place. So check your carb heat periodically, make sure on your pre-flight inspection that there is no water in your fuel system, even in that gascolator that is so hard to get to. Make sure you have at least an hour of fuel reserve when you take off, and make sure you do not cut into it. Consider an alternate landing site to fuel if you have more headwind than expected. Give your engine the care that it needs, and monitor the engine instruments during flight to make sure nothing unexpected is happening.
Fly Safely Everyone,
John
The above story was submitted from Carl Forman with the permission of John Mader P. Eng John is a retired engineer, and is currently a flight instructor at the Calgary Flying Club.
