
After two years and 349.8 hours, my Avid is complete except for its final inspection. I retired in December of 2006 and started looking for an aircraft project to fill my spare time. The following is a short summary of my experiences with the Avid. One can obtain more detail and photographs on the Picasa Web Album at http://picasaweb.google.com/eddantoni1. I encourage everyone to set up a Picasa Web Album to share their flying experiences. It is as effective as a web page and much simpler to use. When I first downloaded Picasa, it automatically scanned my computer for photos and somehow organized them by date or topic.
Having owned an Avid A model a number of years ago, I started looking for an unstarted Avid or Kitfox kit. The Avid and Kitfox Models 1 through 4 are almost identical. The Avid was designed by Dean Wilson and kits produced in Caldwell, Idaho. There was a falling out of the two major partners: Dean Wilson and Dan Denny. As part of Dan’s leaving package, he received a completed Avid Flyer. Dan Denny and the Avid relocated 12 miles down the road at the Nampa airport, where he started producing and marketing the aircraft under the name Kitfox. According to Dean Wilson, there are now 14 different versions of the Avid being sold worldwide as kits, plans, or LSA’s. Most of them are named after predators. Dean Wilson claims he concentrated on technical improvements while Dan Denny concentrated on sales. In the end, concentration on sales proved to be more beneficial.
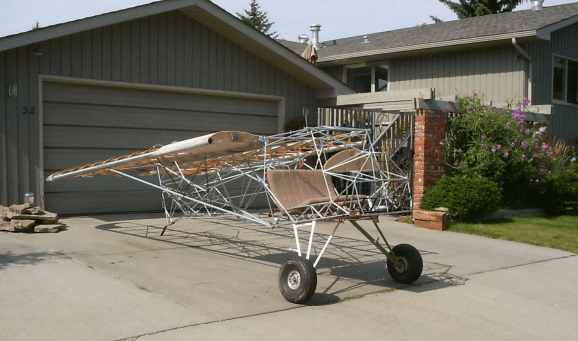
I missed a few good deals and finally made a deposit on a Mark IV in Eugene, Oregon. On inspection, I discovered all of the hardware, and a few other parts were missing. The value of the missing parts was about $3,500. We negotiated a new price, and I was on my way. Everything was loaded onto my GMC Sonoma, and I headed toward home. The trip was fun. The fuselage on top of the rack got a lot of attention. At gas stations, restaurants, and anywhere else I stopped along the way, I met young people who said they always wanted to fly but just knew they couldn’t afford it. When I told them about ultralights, amateur-built aircraft, and the new Sport Pilot category, many of them promised to look into flying. I handed out dozens of “barnstormers” business cards with eaa.org and RAA.ca handwritten on the back. I met one young lady close to the Canadian border who said she was going to go to Vancouver BC and take ultralight lessons. One person I met and still correspond with has since purchased and is installing a 912 on a Rans S-12. The Avid I purchased came with a new but unused Rotax 582, which I sold and then purchased a Jabiru 80HP 2200.
Having drawings for the engine mount, I cut and fit all the parts into a fixture that I fabricated and had welded by Ted Beck. The mounting went well, but after doing much reading on Jabiru web groups, I decided I was not up to maintaining a Jabiru and purchased an HKS.
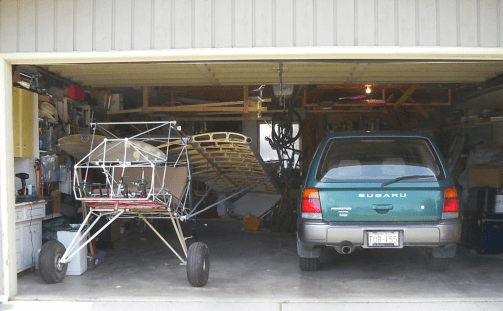
I built the aircraft in one half of a small two-car garage. The wings were hung above the fuselage when not being worked on. As part of my builder’s log, I have two spreadsheets. One records date, time, accomplishments, and hours. It also shows project-accumulated hours. To date, I have logged 349 construction hours. This does not include extra time reading the manual, procuring parts, and driving back and forth to the airport. The other spreadsheet accumulates costs. I quit adding items after I received the engine, as the costs were getting upsettingly high.
Parts procurement was difficult. I had the instruction manual but no parts list. The manual and drawings seldom show bolt sizes. As I progressed, I would purchase at least a dozen of every part I needed, and often 12 of the sizes above and below, still ending up not having the right size. Most of the parts were obtained from Aircraft Spruce, who are great if you know exactly what you want. It is a much different story when it comes to special items. Their staff was polite when I phoned but gave poor or incorrect advice, and never came up with the proper parts or any real help. I never did receive an answer to an email inquiry. In the end, I switched to other suppliers and concluded Aircraft Spruce’s abbreviation AS stood for “Anything but Service.” (ed. I prefer the abbreviation for their full name: Aircraft Spruce & Specialty…)
I received the kit in May; by July, I had finished the fuselage and wings. Fuselage construction was pretty straightforward; just follow instructions and assemble the supplied parts. Wings were more time-consuming; the ribs had to be installed and removed more than once. I had a Jabiru engine mounted by the end of September.
My garage is not heated, so I could not start covering until next July.
Covering and painting were straightforward. I purchased pre-sewn envelopes from Aircraft Spruce. That was a mistake. Of the seven envelopes, only the rudder and horizontal stabilizers were usable without modification. Some of the envelopes were sent back, but Aircraft Spruce refused to acknowledge they ever received them. After the Polybrush coat and the application of what seems like miles of tape, I moved the entire aircraft to Stefanich Field for painting. I purchased an HVLP spray system and a fabric garage to use as a paint booth. Both worked well. If I had known the HVLP system gives so little, if any, overspray, I would have lined my garage with plastic film and done the spraying at home. It would have saved a lot of time and frustration.
The Polyfiber system was used on the fabric and Endura on the cowl. If I were to do it again, I would use Polyfiber up to the finish coat and Endura as the topcoat.
Engine installation was straightforward, and on the first attempt, it started instantly.
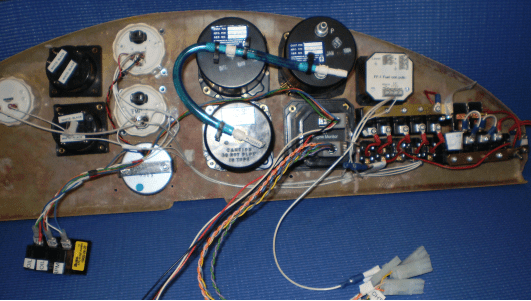
I assembled the instrument panel at home. The pictures show the front and rear of the panel. The MGL-1 engine monitor works well. It provides analogue and digital RPM, two CHTs, two EGTs, oil pressure, oil temperature, and an hour meter. I plan on building a new panel, eliminating all of the analogue instruments on the right. I tried my best to be neat and organized, but after installing the panel in the aircraft and hooking up the instruments, I had my usual spaghetti mess.
Photos show the completed aircraft except for the Marks C – FKAF.

I will provide performance figures once the aircraft is flying.
