
Finally, the cottage is essentially done for the winter. That means I’m back in the saddle again… just in time for the end of Day VFR flying in the evenings! Oh yeah, night flying is also out as the Cessna 150 goes in for her annual check-up. But that’s OK, I still have those 3-day weekends to get out and bore some holes in the sky!
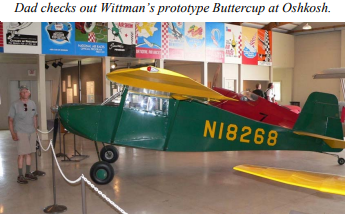
For me, autumn marks the beginning of the building season. I’ve had a Wittman Buttercup “kit” sitting in my garage for nearly 2 years now, and I’m FINALLY getting a chance to get started on it.
I had planned to start it two years ago, but other projects kept getting in the way. It started with a home reno project that stretched in scope and time from a simple kitchen cabinet swap to a complete gutting of the kitchen including drywall, electrical, plumbing, and even an exterior wall! That led to new siding and all new windows!
We then had the bright idea that we wanted a cabin on the lake. That took care of this spring, summer, and most of the fall (not to mention a good chunk of next summer)!
The other surprising thing I found out was just how much time is involved in owning a second aircraft. With the upgrade work we’ve done to the Cessna, it has taken up a significant amount of the dwindling spare time I have available.
However, I have finally freed up some time to get started on the Buttercup. Home renos are essentially complete, the C-150 still needs an annual, but that should be done by November 5th, and even the amount of time spent flying will start to dwindle as winter sets in.
So, where do you start when looking up a mountain of aircraft building tasks to be done? Well, I developed a few opinions on that subject over the years of building Chrissy. For tube, wood, and fabric planes like the Buttercup, many books and articles suggest building the wings first. It usually represents a low material expenditure, and most builders already have the woodworking skills needed to build a wing rib. Also, once the wings are completed, they are easy to store out of the way while you work on the fuselage. However, I don’t really subscribe to that idea. Let’s face it, building wing ribs can be a boring, repetitive task without a lot of visual progress. We all know that only about 10% of all scratch-built planes are completed by the builder who started it. One of the main factors for the statistic is a loss of interest in the project. When family and friends come to look at the plane you’re building, it’s a little disappointing to show them a wing rib. On the other hand, starting with the fuselage will quickly get you something that “looks” like an airplane. This tends to inspire most builders to forge on as they build parts to add to the plane.
The other fact here, in the northern climates, has to do with weather. Things like welding, covering, painting, and other processes that generate fumes are best done when you can get some fresh air ventilation; in other words, opening the doors and windows. For me, I’ve found that it’s best to concentrate on woodworking and systems-type stuff in the winter months, welding and painting in the spring/fall months, and flying in the summer.
So, for me, this means I’ll be digging into the fuselage right away. The first step is to build a 16’ x 4’ workbench to assemble the fuselage on. Then, lay out the fuselage sides and build a jig to tack the two sides up. It’s not much different than building a model airplane, except the bits are welded together instead of glued. Personally, this is my favorite part of the building process.
One other thing I’ve learned from building the Christavia is to follow the plans. Sure, I intend to make a couple of minor changes like widening the fuselage from 40” to 44” and bowing the doors slightly, but these have already been done by the designer on subsequent fuselages he’s built. This will provide more space for my trim posterior as well as allow for a 10% increase in fuel capacity.
I may also have to increase the height of the panel by a couple of inches to allow for the installation of the radios since the rear of the fuel tank sits about 7” from the panel. Increasing the height will allow the radios to slide in over the tank.
Boy, I really have to get this newsletter to bed so I can get out and start building!!!
