Hooray! The Cessna 150 project is finally complete! I started the project just about a year ago. When I first bought the plane, the idea was to get my commercial license in it and then sell it. I had also hoped that my wife would consider getting her license with it, in which case, it would remain her plane.
The “project” started out simple enough. I was just going to add a few things during the annual inspection to spruce her up a little. These included new yoke grips with built-in PTT switches, new carpet, and replacing about half of the plastic interior panels. I also wanted to replace the oil screen with a filter kit and add the Challenger/K&N air filter.

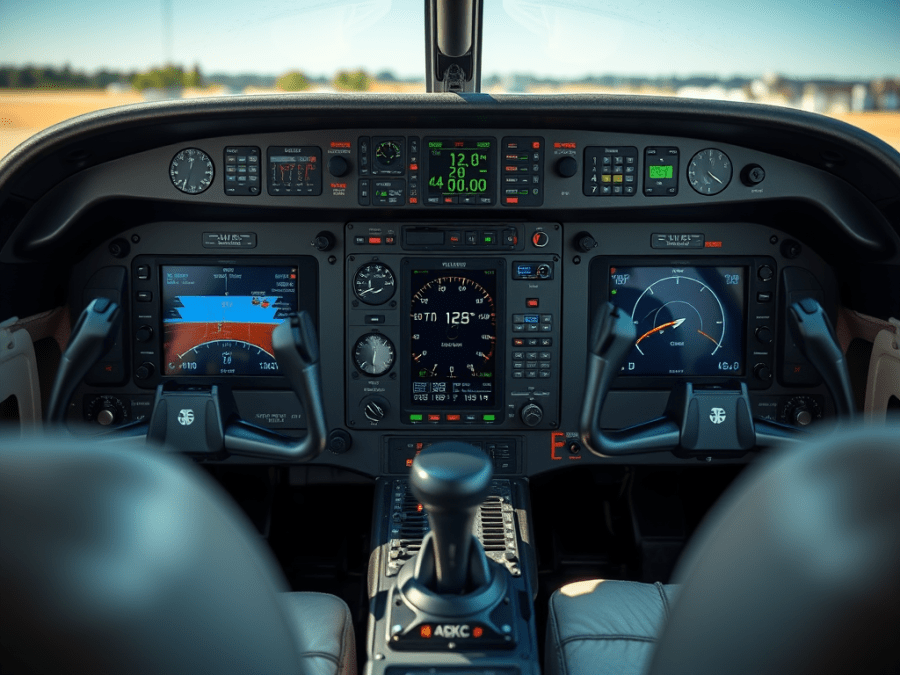
However, I decided that the avionics could do with an upgrade. The plane originally came equipped with a KX-170 NAV/COM (a non-TSO’d, 360-channel transceiver) and a KT-76 transponder with no encoder. I worked with Dave at Canadian Avionics to come up with a plan to upgrade the stack with new, TSO’d equipment. I wanted a NAV/COM with glideslope and decided to go with the KX-125, the 760-channel digital replacement to the venerable KX-170B. Although the KX-125 has a built-in, digital OBS, I added a KI-214 indicator head that has an integrated glideslope receiver.
The plane came with a portable intercom system (ICS) that was marginal at best and was mounted to the floor, well out of reach when buckled in. I first looked at the various panel-mounted ICSs available and realized that it wouldn’t be that much more to install an audio panel instead. Along with providing the ICS functionality, I would also get the ability to use it for additional radio systems in the future. I chose the PS Engineering PMA6000MC audio panel that came complete with a marker beacon receiver. Although marker beacons are not used much in Canada, they are used extensively in the States.
The transponder was weak but still within limits, so I decided to leave it alone and add a new encoder. Unfortunately, the KT-76 lasted exactly one flight after the avionics upgrade, then packed it in. To replace it, I decided on the Garmin GTX 320, their basic solid-state (i.e., no expensive cavity to replace), analog workhorse.
That completed the panel… for now. I’m still considering going IFR which would require another NAV source. Traditionally, this would be met with either an additional NAV/COM or an ADF. Now, we have the option of using an IFR certified GPS instead, but they require the addition of an annunciator panel and a NAV head (much like a VOR head). In any case, the final piece will be a fairly pricey addition.
The installation went quite well, and I’m really pleased with the work performed by Canadian Avionics. They do quality work for a fair price. They even provided me with a loaner transponder while we were waiting for the new Garmin to arrive.
The avionics were now great, but I was still a bit concerned about the amount of vibration I was getting from the engine and the amount of oil leaking under the cowls. The engine had 2100+ hours on it, and I was afraid it was showing its age. Then, along came N6095G, the Cessna 150 I recovered from Florida. As I mentioned in my column last month, the engine was recently overhauled and had a mere 103.24 hours SMOH. The engine had passed its inspection at Stauffer and had run fine on the test stand. We decided it was time to swap engines.
Dropping the old engine only took a couple of hours. We cleaned up the old mount and firewall, inspecting the condition of the remaining firewall forward parts. The source of the vibration became quite clear when we pulled the old rubber bushings off the mount. They were a mess and had eroded away quite a bit of the rubber material. Fortunately, I had already ordered another set of bushings to replace them on the new installation. We left her without an engine for a week while we assembled the required parts for the installation.
The one big change between the two engines was the fact that the new engine had a “key-start” style starter (what most folks are familiar with), while the old engine was a “pull-start” operated by a T-handle on the panel. A Bowden cable connects the T-handle with a lever on the starter which, when pulled, engages the starter gear and closes the electrical circuit to start the engine.
We replaced the starter on the new engine with a Sky-Tec Fly-Weight model that included all the parts needed to convert from pull-start to key-start. It’s also 7 lbs lighter than the original and has a lot more torque! We also replaced the oil screen with a filter system as I had done with the old engine.
The installation went very smoothly. Most of the work was done on a Saturday by the AME, Mark Bushrod, and me, with some assistance from Ralph Inkster. We tidied up some loose ends on Tuesday evening and took her out for a test run. I gave her three shots of prime, and it caught on the third blade. We had good oil pressure within five seconds. The new starter is really powerful, and the engine is wonderfully smooth.
The results were worth it. So far, the engine has been tight with no leaks. There were two things that became quite clear through this change. Running an engine beyond the recommended TBO is not a real problem. However, as you reach the TBO, measures should be taken to ensure the engine continues running well. A thorough inspection of the engine mount is a good place to start. Clean down the engine as much as possible and track down the source of any leaks. Usually, they can be easily fixed with a couple of hours of labor and a new gasket or two. Finally, replace the mount bushings. After a couple thousand hours and decades of use, they will definitely be breaking down. The vibration will significantly decrease, as will the chance of a catastrophic mount failure.
The second thing that caught my attention was the amount of carburetor ice that can build up on these little engines! The entire intake manifold above the carburetor was coated in about 1/4” of frost and ice after a 15-minute ground run! Granted, it was about -5C and foggy when we ran it, but it was a good reminder to keep checking the carburetor heat while flying.
Three days later on Friday, I finally got to sample the fruits of our labor! I fired her up and taxied out for a run-up. Everything went well, so I decided to head out into the circuit. Initially, the engine was making about 2350 static RPM, but by the end of the hour, I was seeing just under 2500 RPM! I can only suspect that the engine took a little time to re-seat the rings having not been flown in 6 months. The climb rate also went from about 350 fpm up to 500 fpm as the flight progressed.
The only unfortunate thing that we’ve found is that in re-weighing the plane, we discovered that she had miraculously gained 35 lbs since her last weighing. That 35 lbs has made it unusable for me and an instructor to fly in and still stay under the legal gross weight. That means that all the dual training will need to be done on the club planes. Either that, or I’ll need to lose 35 lbs…
